MapSamurai Lite Documentation
Welcome to MapSamurai Lite — the free version of our powerful map-building plugin for WordPress. Use this guide to get your map published in minutes, no coding required!
Getting Started
Install the Plugin
1. After downlaoding the MapSamurai Lite plugin, upload the plugin’s ZIP file via Plugins > Add Plugin in your WordPress admin panel.
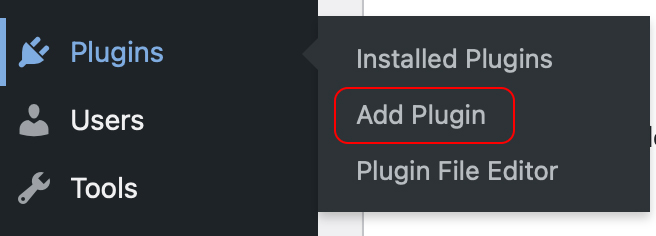
Alternatively, you can search for “MapSamurai Lite” in the WordPress.org directory, and clilck “Install Now”.
2. After installing the plugin, activate the plugin by clicking the “Activate” button, and that’s it! You’re ready to setup your map.
MapSamurai Lite Overview:
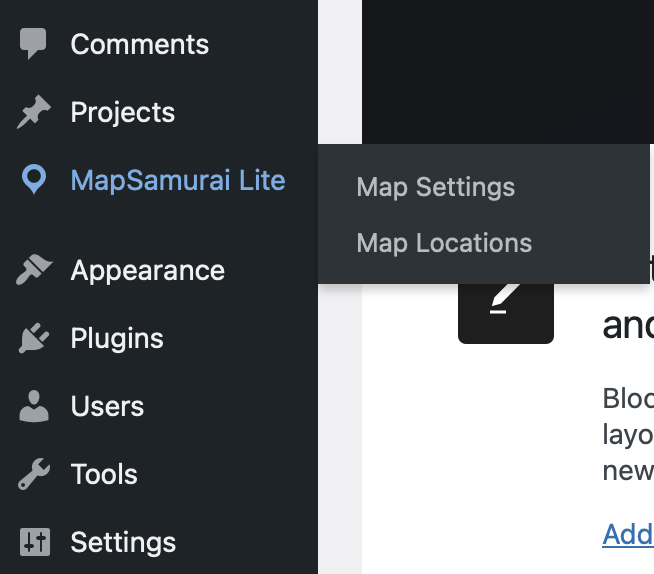
After installing and activating MapSamurai Lite, you will see a new entry in your wp-admin’s left sidebar titled “MapSamurai Lite”. This section contains everything you need to customize your map and to add map locations. It’ll look like this:
Step One: Customize Your Map
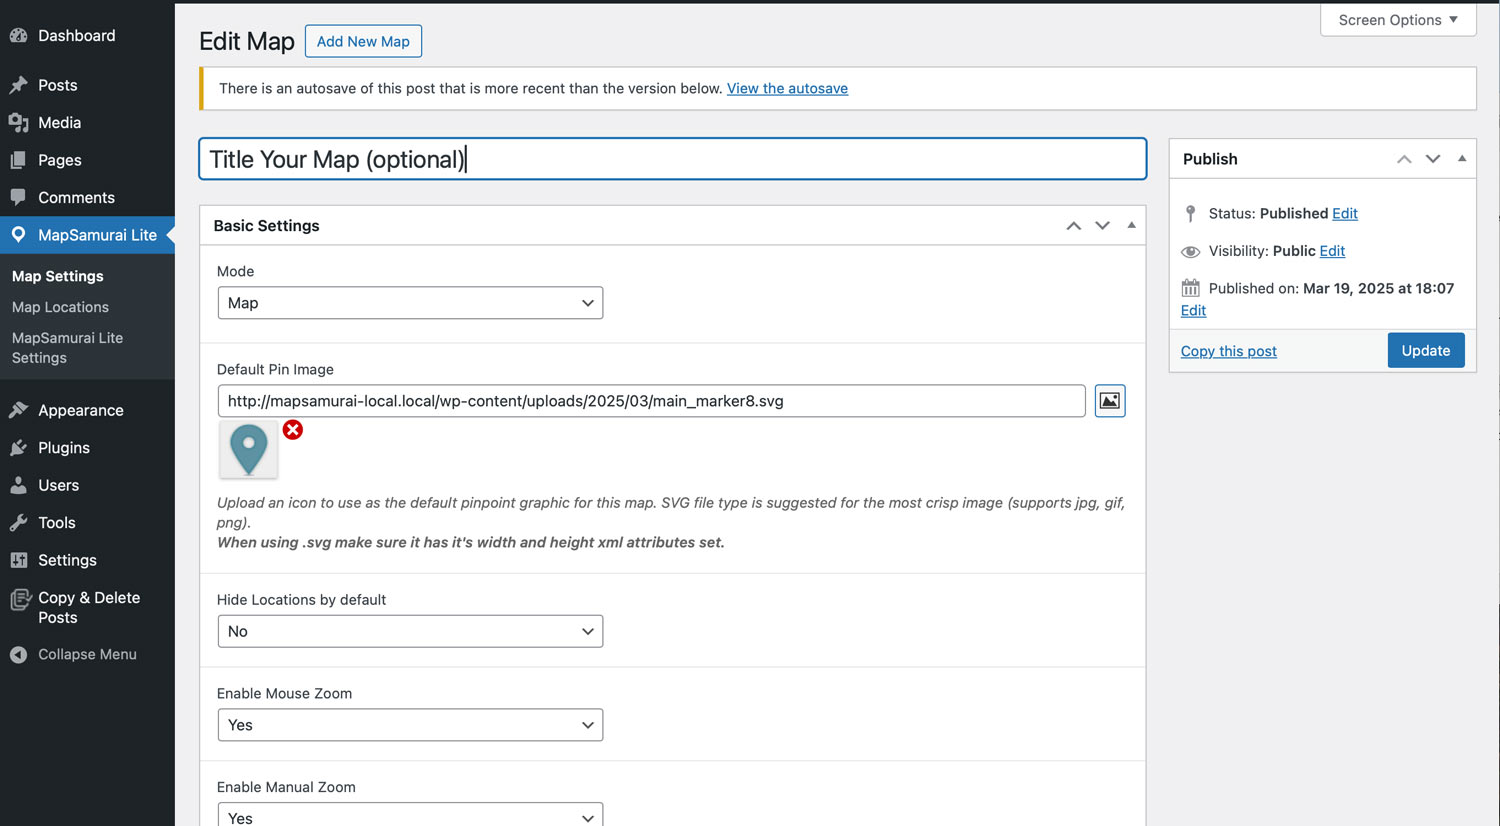
The first step you’ll want to take is setting up your map. To do so, go to MapSamurai Lite > Map Settings. Here you’ll see the map customization screen. Below is a quick preview, but we’ll break down every settings later in this documentation:
MapSamurai Lite lets you customize your maps to your exact needs, whether building a store locator, documenting travels, and many other mapping project. Let’s walk through each map setting below:
Basic Settings
The first section contains the core settings of your map, as you’ll see below. Scroll beneath the screenshot for a detailed desciption of each setting.
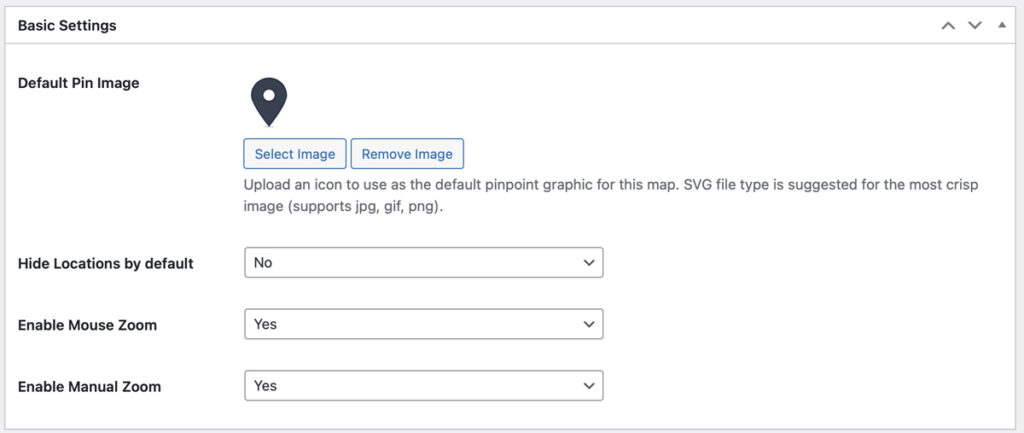
Default Pin Image: Optionally add any pin image you like, and it will be used for every marker found throughout your map. File formats must be jpeg, png, or svg. Note if you don’t uplaod an image, the map will use a default pin image.
Hide Locations by Default: If ‘Yes’ is selected, all locations will be hidden until a user decides to perform a search. Then, only relevant locations will appear based on their search criteria. In most cases you’ll want this to be set to “no” so all locations appear on the map by default.
Enable Mouse Zoom: Enables/Disables mouse zoom on the maps. Disable if you prefer that the user can’t scroll using their mouse wheel. This can be useful for full wdith maps where the user may get “stuck” in the map while scrolling down your website. You can then defer to the +/- interface for zooming in and out of the map.
Enable Manual Zoom: Add or hide +/- icons that can be clicked to zoom the map in or out. We recommend keeping this enabled.
Tooltip & Marker Settings
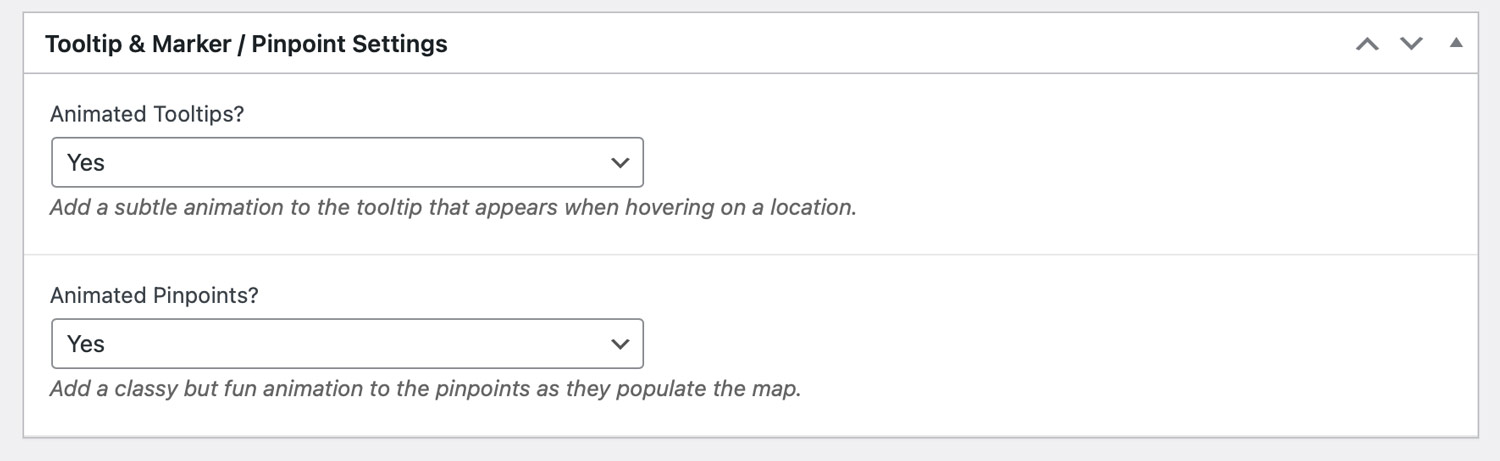
Animated Tooltips? If enabled, tooltips will fade in with a subtle animation effect.
Animated Pinpoints? If enabled, map markers will “drop in” with a subtle animation effect.
Interactive List of Locations Settings
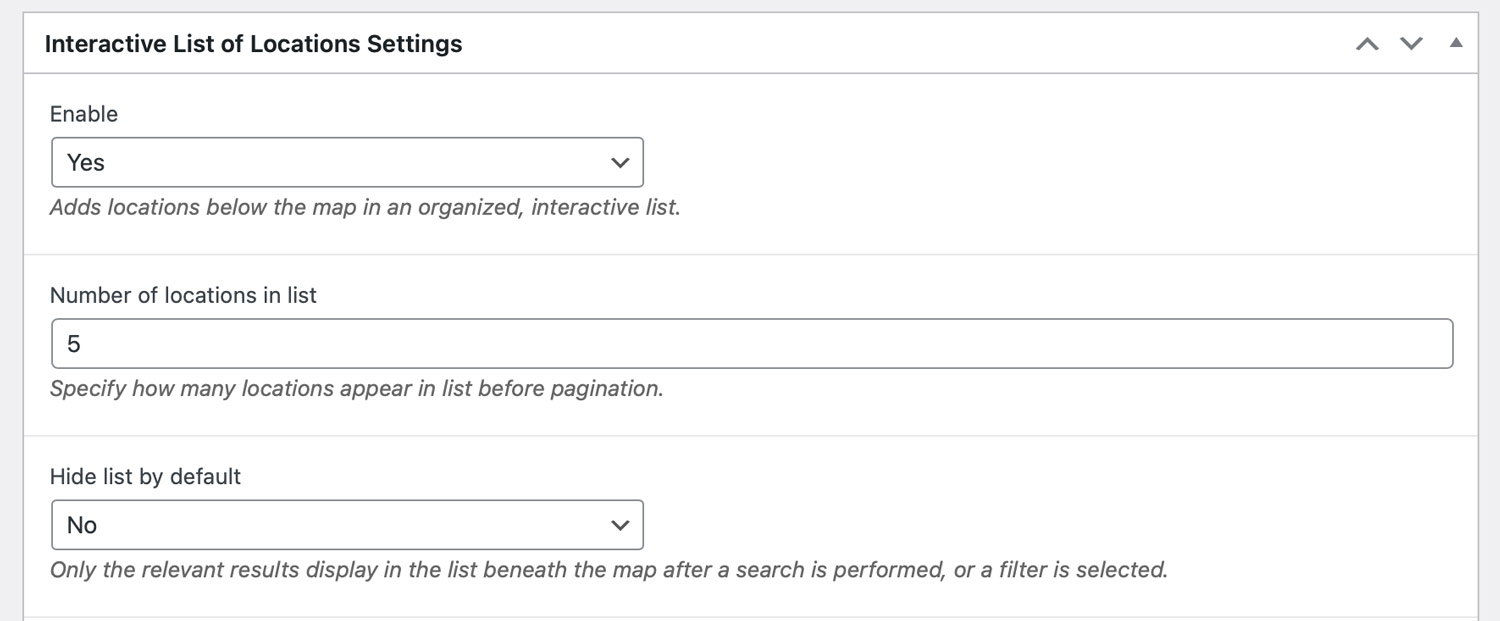
Enable: If set to yes this will add a preview of each locaiton in a sleek, scrollable list located directly to the left of your map. This list contians the title of the location, preview text, and a button that will open the location’s details and gallery.
Number of Locations in List: Allows you to specify how many locations will appear in the list before pagination occurs. For example if set to “5” then users can scroll to see 5 locations on the list, and would then need to click the “Next” button to see the next set of locations.
Hide list by default: Choose to hide the list until someone performs a search. Items will dynamically appear in the list only if they meet the search criteria. This allows you to present your map clutter-free by default, and only add the list after the users searches in a specific area.
Default Zoom Level and Location Settings
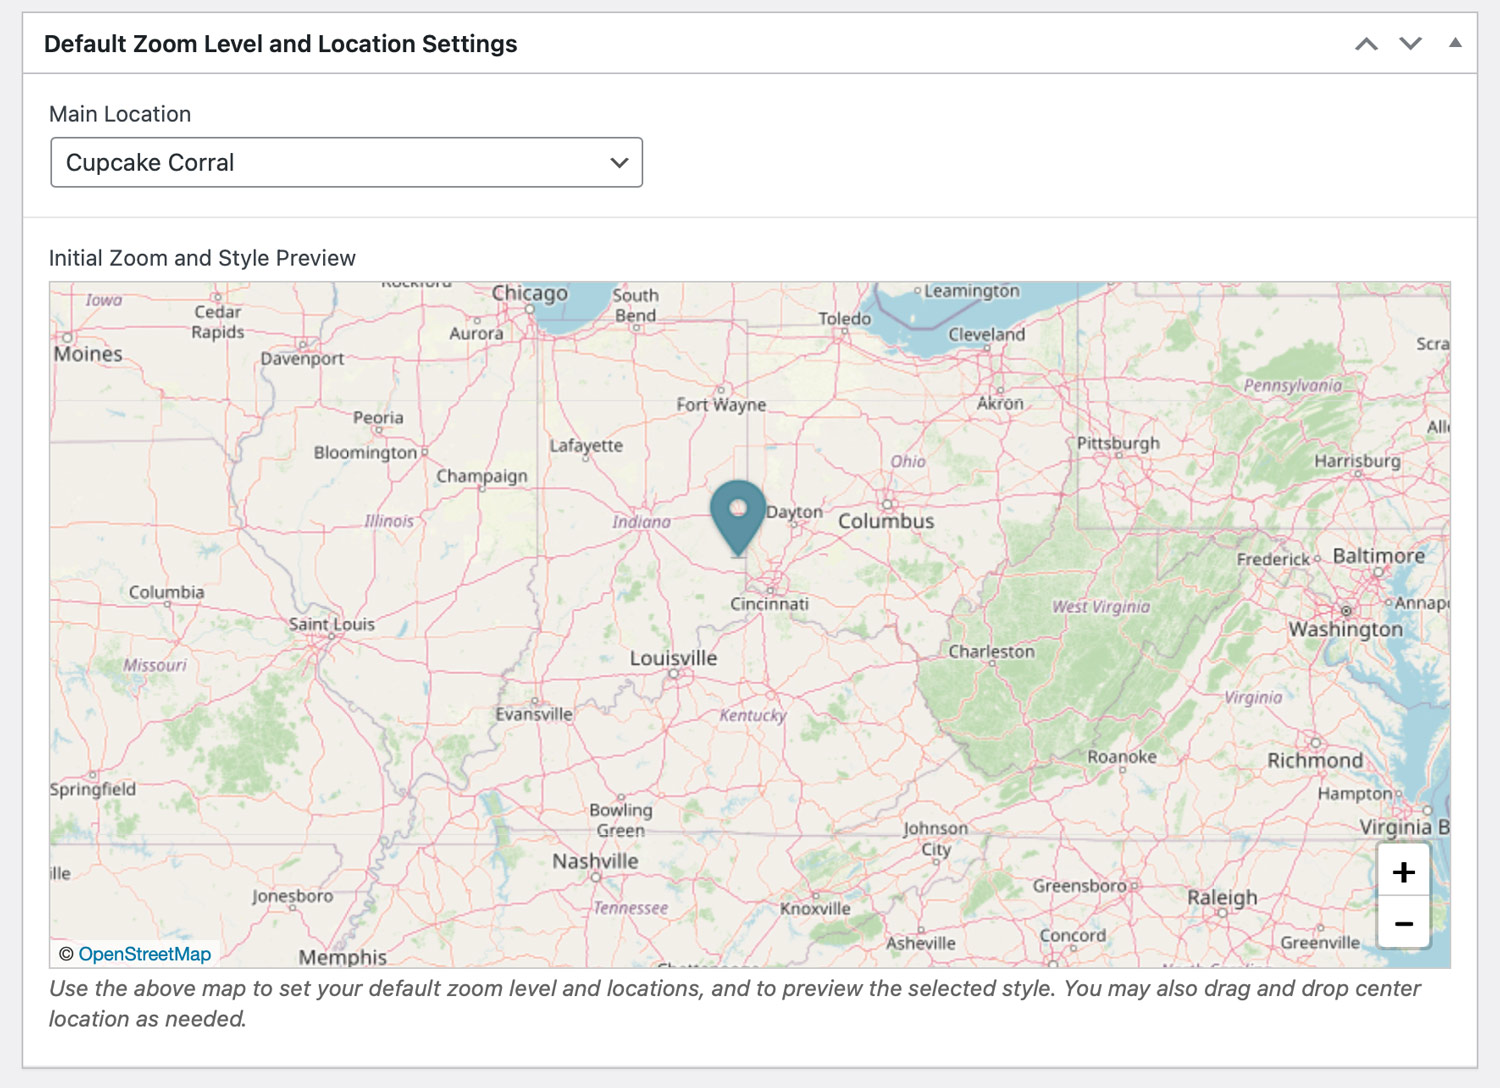
As shown above, you’ll see that there is a fully funcitoning map in the Map Settings page. This map lets you to set the default zoom level, as well as selecting the default “center” point of your map when it first loads on your front-end site. You can set this up in one of two ways:
In the :Main Location” Dropdown:
1. Select a location from the “Main Location” dropdown to center your map on a pre-existing location. Note you must of course first add at least one locaiton to use this method.
2. Manual Center & Zoom: Alternatively you can drag and drop the map marker to manually specify the center of your map. This let’s you specify the exact center point where your map should be centered when first displaying on the front end.
After setting your center location, you can use either mouse xoom, or the +/- icons in the lower right corner of the map to specify trhe default zoom level of the map when it first displays on your front-end site.
Finalize and Saving Your Map
After you’ve selected all of your settings and perfected your map, simply click Publish/Update and your map is ready to go! Note that after publishing your map, you’ll see that it will generate a shortcode in the right menu area. We’ll come back to this later, but it will look like this:

Your map is ready to go! Now it’s time to add your locations, which we’ll cover in the next section.
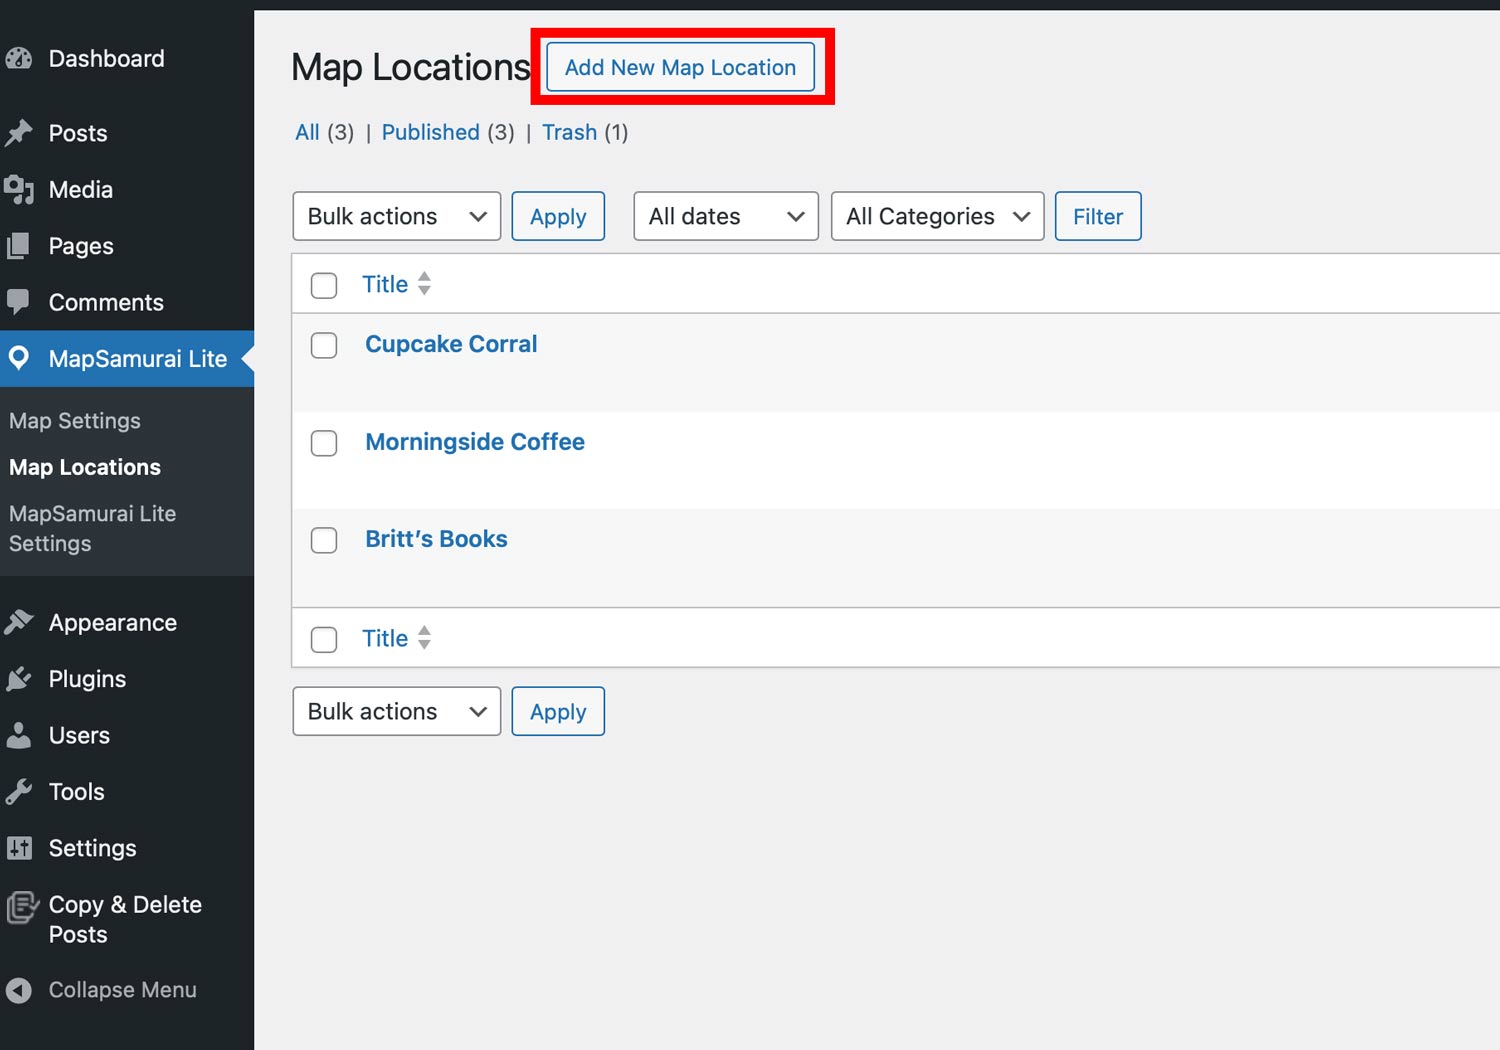
Step 2: Adding Locations to Your Map
Now that you’ve set up your map, it’s time to start adding locations! MapSamurai Lite lets you add as many locations as you need, and you’ll do so by navigating to MapSamurai Lite > Map Locations. Later you’ll find a list of locations in this section, but to create your first, click the “Add New Map Location” button as indicated below:
Map Location Settings
Ok, let’s dig into the overall settings that you’ll need to specify for each of the location markers you’d like to add to your map. On clicking “Add New Location” (or editing an existing location), you’ll see the location’s overall settings, as shown here:
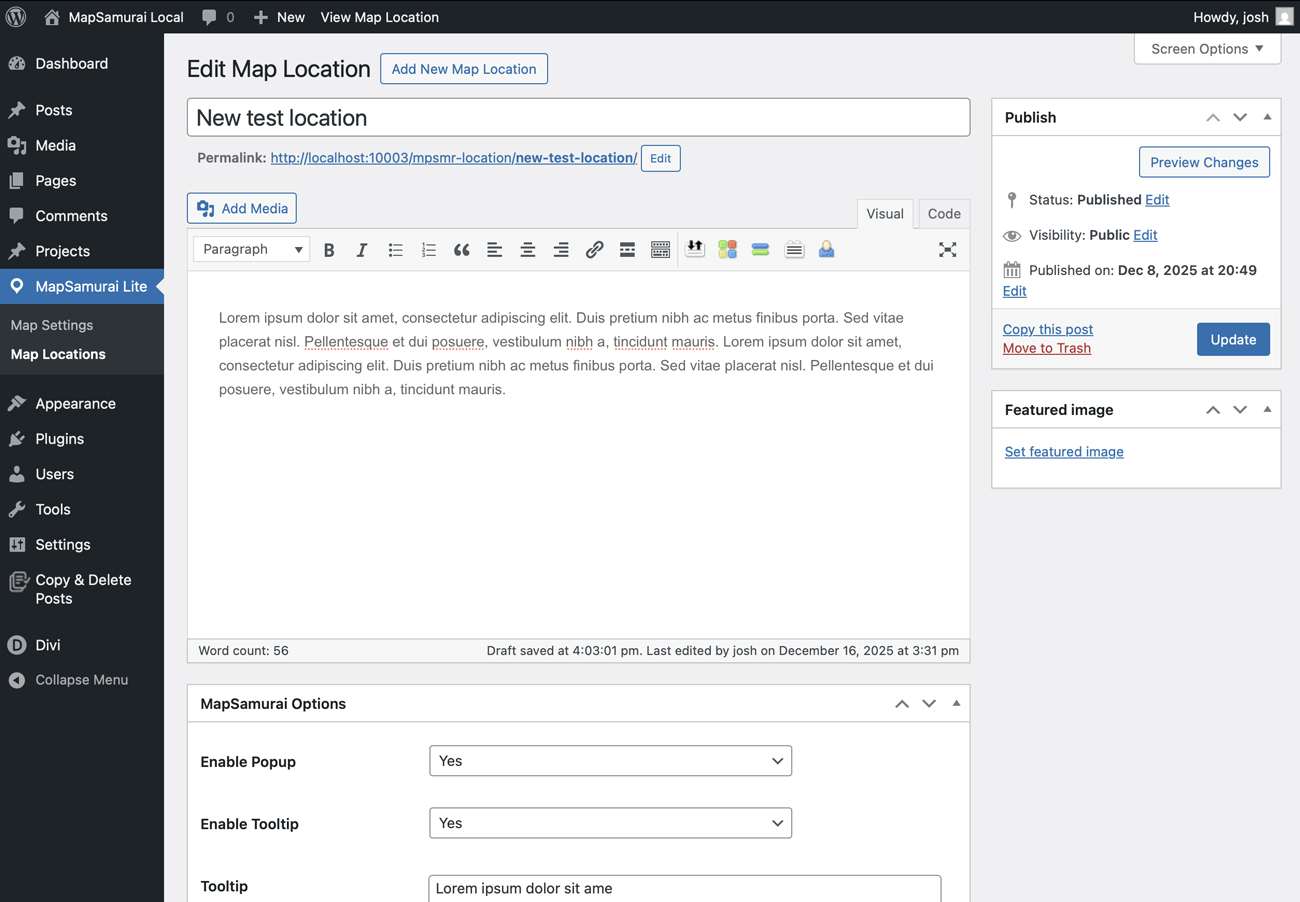
Now, let’s break down every feature below. As we did with the Map settings, we’ll explain every detail beneath each screenshot:
Title & Description
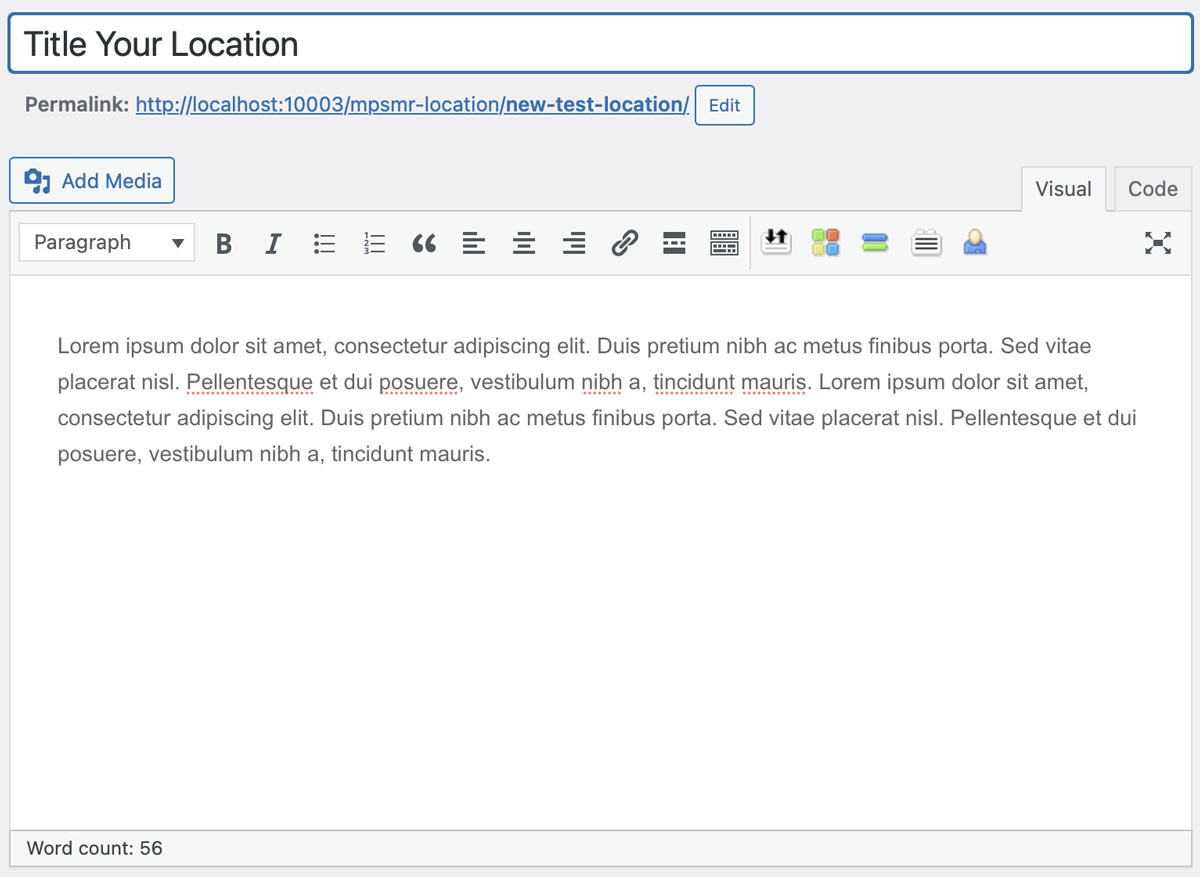
Title: Give your location a title. This will appear in the tooltip when a user hovers over the location on the map, in the interactive location list (if enabled) as well as in the gallery popup that presents the full location details.
Description: This description can provide in depth details about the locaiton, menu items, travel stories, or any other details you’d like to share. Appearing in the location overlay when a user clicks on a map marker, this chunk of text combines with the video/photo gallery to provide a thorough overview of any given location. Note the description field supports all text formatting, embeds, and html for further customization.
Basic Settings

Enable Popup: Each MapSamurai map locaiton can include a detailed overlay that includes the location ddescription, video/photo gallery, and more. Enable this setting to ensure the popup overlay is included.
Enable Tooltip: Specify if you’d like to include a tooltip that appears when hovering over the map location marker.
Tooltip: This will be the text based content that appears in the tooltip when a user hovers over the map marker. You’ll want to keep this brief with a summary of the location that will entice users to click to find out more.
Include on Location List: The location list, if enabled in your map settings, will add an organized list of locations to the left-hnad side of your map. Enable this setting if you want this specfic location to appear in that list. This is set to Yes by default since it’s assumed all locitons will appear both on the map itself, and in the directory list.
Short Description: This is the brief text that will appear in the list view in regards to this location. Somewhat longer than the tooltip, it is intended as an easy to digest snippet of info that serves as a preview of the more detailed information included in the popup. Alternatively, you can disable the popup altogether and simply use this desciption to do the heavy lifting (for example, if you don’t want to add a long description and/or gallery, and only want to display the map’s locations and interactive directory list.).
Gallery Settings
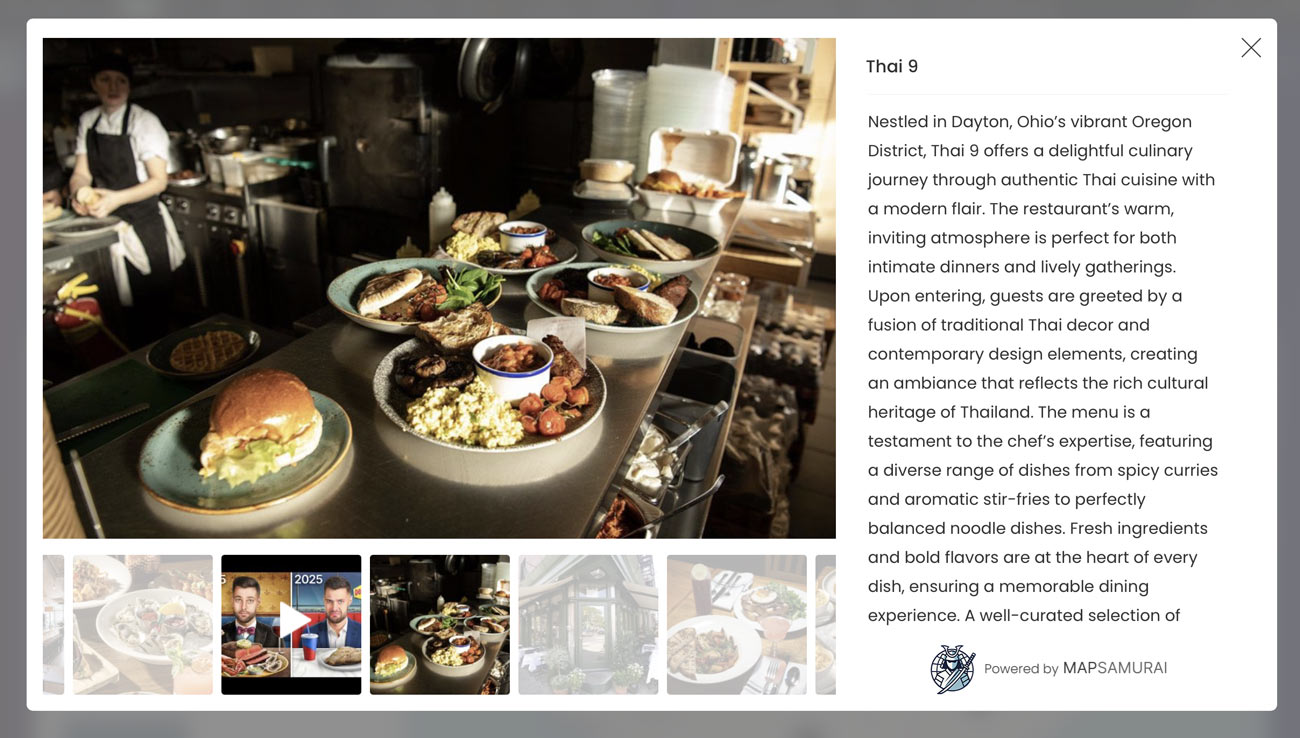
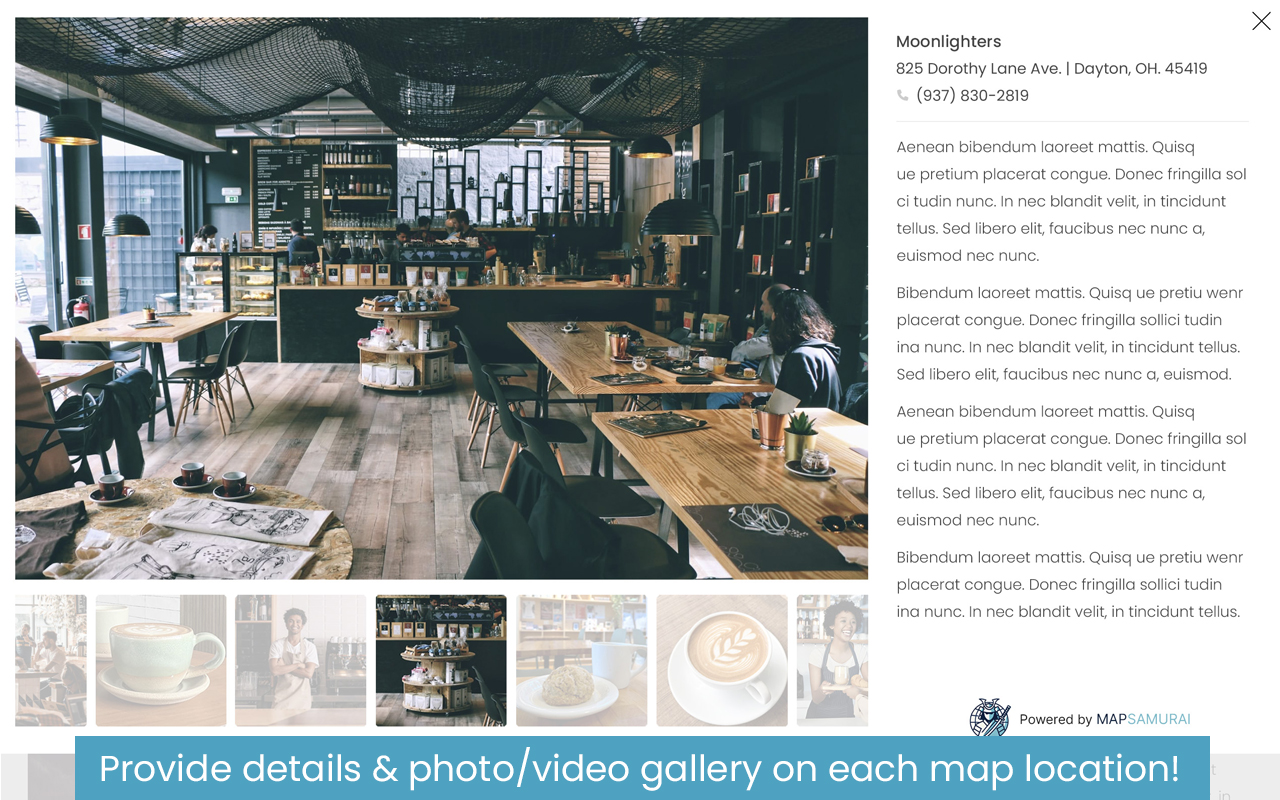
MapSamurai Lite lets you add an optional video/photo gallery to any location. When clicking on a locaiton on the front-end map (or selecting “More Details” on the interactive list entry) the user will see a beautiful modal popup gallery of a video (optional) and any photos you add. Let’s cover how this is done below:
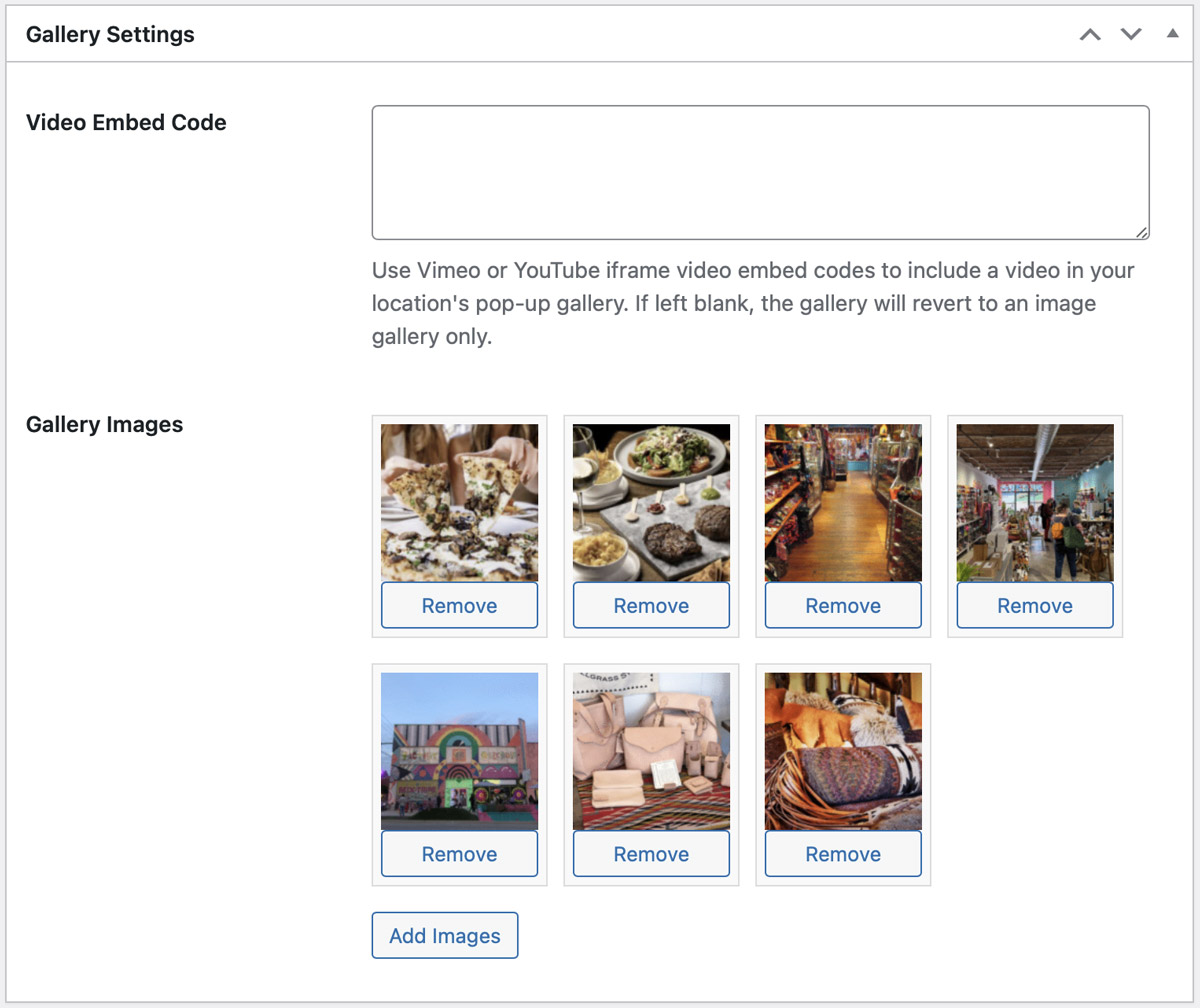
Video Embed: You can include a single video in your popup gallery by embedding either a youtube or Vimeo video here. You’ll simply copy the embed code from the YouTube or Vimeo video, and paste it here. Each location can have a single video. If you choose to not uplaod a video, the user will only see the photos.
Gallery Images: You can add as many photos as you like for each location. Perfect for presenting menu items, photos of the location, travel photography, and more. This interface uses the familiar WorsdPress image uploader, and you can add all images in a single upload. Simply click “Add Images” to select images to include in the gallery, and you can of course remove images by clicking the “Remove” button beneath each thumbnail as needed. Note that thumbnials are generated automatically, and your gallery will look something like this on the front-end map:
Plotting the Location
You’ll of course now want to plot the exact location on the interactive map. You’ll do so in the section titled “Location Coordinates” as shown below:
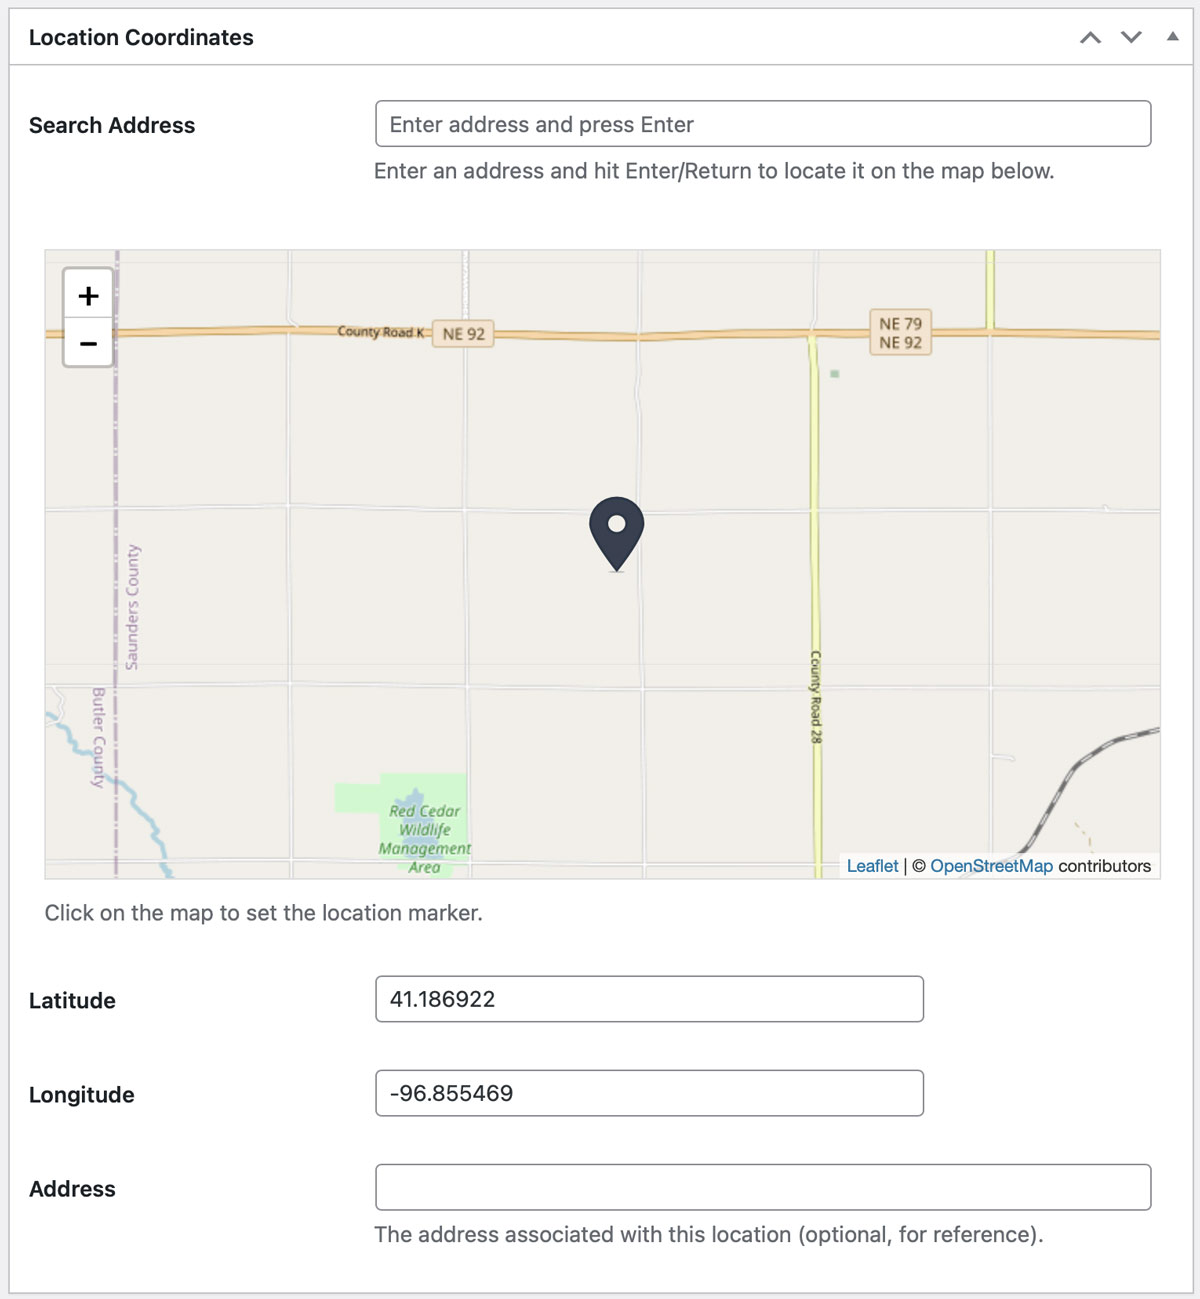
You can add the locaiton in a number of ways:
1. Enter the location address in the “Address” field, then and click your keyboard’s return/enter key. This will plot the location at the exact address entered.
2.To manually plot the locaiton, simply double click on the map to add the location directly. Note you may also drag and drop the location’s pinpoint/marker to fine tune its placement directly on the map.
3. You can enter the exact longitude/lattitude of the location, and press your enter/return key on your keyboard. This is good for off-road sites such as nature-based locations.
And that’s it! Once your’e happy with your settings, click the “Publish” button at the top-right of this page (or “Update” if editing an existing location), and the location will offficially be published on your map. Now, rinse and repeat for your other locations to complete your map setup!
Next, it’s time to publish your map!
Displaying/Publishing Your Map
At this point you’ve created your map, and added your locations to the map. So, it’s time to publish the map on your site! As we mentioned earlier, MapSamurai Lite makes this process extremely simple via a simple shortcode.
How to find the shortcode: After publishing your map, you can open the Map Settings screen and locate the shortcode in the top right sidebar. it will look like this:
See that big “Copy” button? Click that to add the shortcode directly to your clipboard. Note you can also edit the shortcode a bit to specify the height/width of the map. That would look something like this:
[mapsamurai_map map_id="[your map ID]" height="550px" width "80%"]
You can adjust the width and height as needed to fit the container where you’ve placed the shortcode. However please note that a MapSamurai Lite map will never overwrite your theme’s CSS, so you may be limited to how that map displays based on your theme, where you’ve place the shortcode, and so on.
Mapify Lite shortcode can be placed anywhere on your site, whether via a page builder module, or native WordPress templates!
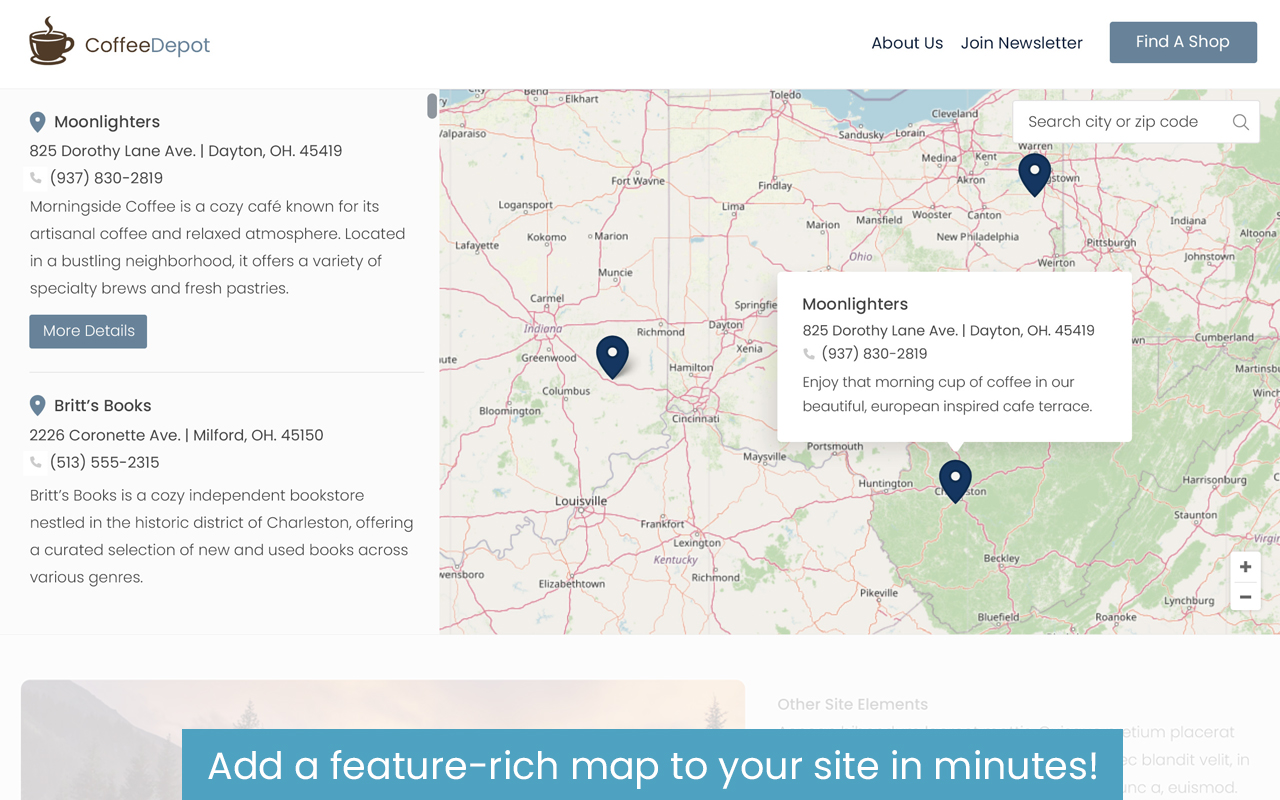
It’s really as simple as that. Once you update your page and have properly included your map, your map will officially be live on your front-facing website. Here are a few screenshots of how it may appear:
Front Facing Map:
Location Gallery:
In Summary
Mapify Lite was designed to balance usefulness and simplicity, and we hope you enjoy the product! To get a better idea of how your map would look, and our FAQ, please check out the Mapify Lite Demo here. For support issues or if you have any questions, please feel free to reach out here. Otherwise, we hope you enjoy MapSamurai Lite!
Still Need Help?
We pride ourselves in transparent pricing and product clarity. If you have questions, or need tech support, feel free to reach out below.